Have you ever heard a strange “water inside phone sound” when using your smartphone? It’s a common concern for many phone users, especially after accidental spills or exposure to moisture. The good news is that this issue is often solvable with a little know-how. In this blog post, we’ll delve into the causes of the “water inside phone sound,” possible solutions, and steps to prevent future damage. We’ll also touch on related topics such as how moisture affects electronic devices and troubleshooting tips for when you hear the “water inside phone sound.”
What is the “Water Inside Phone Sound”?
If your phone starts making a gurgling or bubbling noise, it can often be attributed to the presence of water or moisture inside the device. This sound usually comes from the phone’s internal components like the speakers, microphone, or even the camera lens, which may have come into contact with water. A common cause is when the phone has been exposed to rain, dropped in water, or even when it’s been stored in a humid environment. The moisture inside the phone interacts with the internal components, leading to the unsettling “water inside phone sound.”
Why Does Your Phone Make a Water Sound?
The “water inside phone sound” is more than just an annoying noise; it’s an indication that moisture has made its way into your phone. Several components are sensitive to water and can cause this sound, such as:
Speakers and Microphone: The water can interfere with sound waves, producing a distorted or gurgling noise when you make calls or listen to audio.
Internal Cavity Moisture: If the phone was submerged or exposed to liquid, moisture might remain trapped inside. This can lead to strange noises when the phone is moved, tapped, or shaken.
Water-Activated Sensors: Most modern smartphones have water damage indicators. If these sensors detect water, the phone might emit sounds or behave unusually until the moisture is cleared.
How to Diagnose the Issue: Is It Water or Something Else?
Before jumping into solutions, it’s important to first confirm that the “water inside phone sound” is caused by moisture. Here are a few things to check:
Water Indicators: Many phones come with built-in liquid damage indicators. Check the back of your phone near the SIM card slot or inside the battery compartment (for older models) for any water sensor discoloration. If the indicator has turned red or pink, it means water has entered your device.
Moisture Residue: You can gently tap or shake your phone near your ear to hear if any liquid is sloshing around inside. If you feel moisture, that’s a clear sign that water has found its way inside.
Screen and Buttons Response: In some cases, the screen or buttons may become unresponsive or glitch when exposed to water. This can help you diagnose if the “water inside phone sound” is caused by water damage.
What to Do if You Hear the “Water Inside Phone Sound”
If you’re hearing the “water inside phone sound,” there are several steps you can take to try and fix the issue. Here’s a comprehensive guide to troubleshooting:
1. Turn Off Your Phone Immediately
The first step is to turn off your phone to prevent further damage. Leaving it on while there is moisture inside can cause short circuits or further damage to the internal components.
2. Dry the Exterior
Wipe off any visible water on the phone’s exterior using a dry, soft cloth. Make sure to focus on areas like the ports, buttons, and camera lens where moisture can accumulate.
3. Remove the SIM Card and Memory Card
Take out the SIM card and memory card (if applicable). This helps to prevent corrosion and ensures that the water does not damage these components. It also allows better air circulation inside the phone for drying.
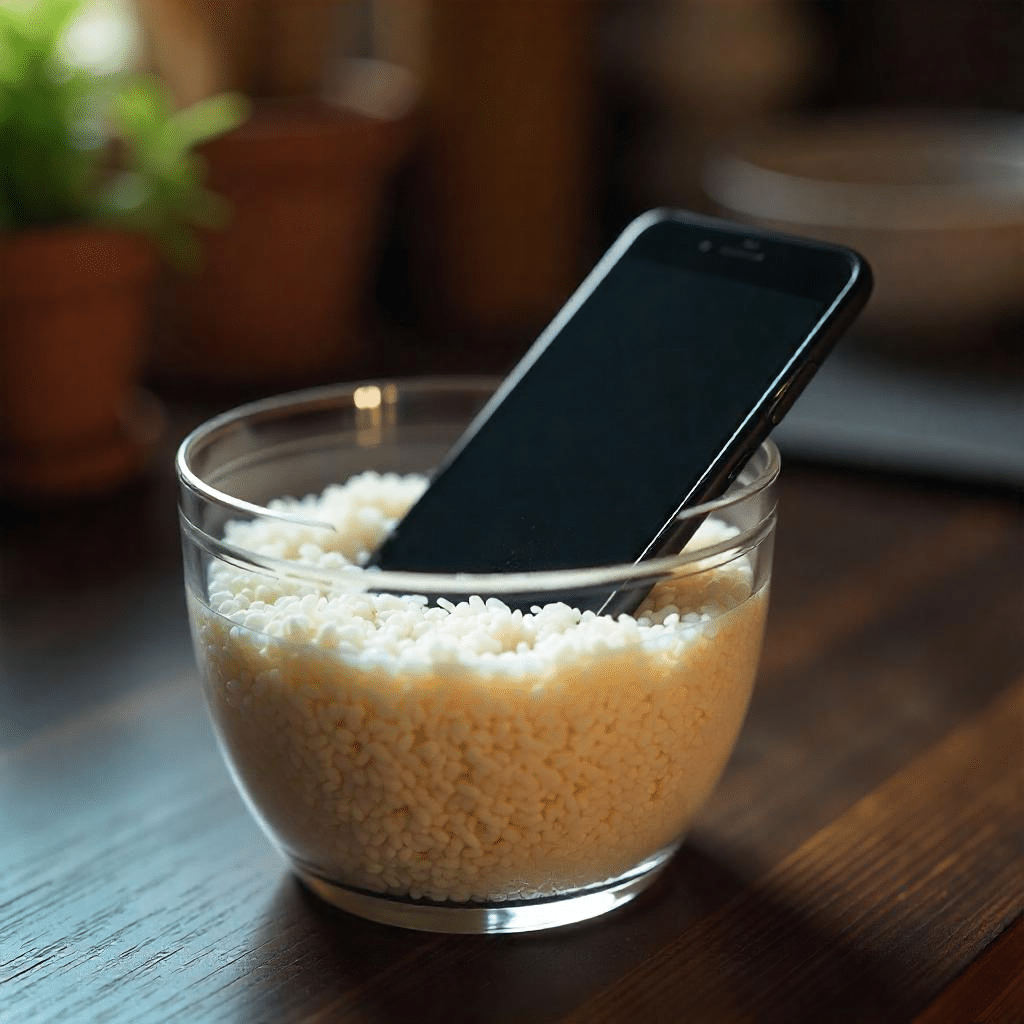
4. Use Silica Gel or Rice (Optional)
Place your phone in a bag of silica gel packets or a container of uncooked rice. Both rice and silica gel help to absorb moisture from the phone’s internal components. Leave the phone in the bag for at least 24-48 hours to ensure it’s completely dry. Silica gel works better, as it’s more efficient at moisture absorption than rice.
5. Try the “Water Inside Phone Sound” Fixes
If your phone is still making the “water inside phone sound” after drying it, here are some additional fixes to try:
Shaking the Phone Gently: Gently shaking your phone can help to dislodge trapped water inside. Be careful not to shake it too hard, as this could cause further damage.
Use a Compressed Air Can: If you have a can of compressed air, you can use it to blow out any remaining moisture from the phone’s ports. Hold the phone at an angle and spray the air into the charging port, headphone jack, or SIM card tray.
6. Check the Speaker and Microphone
If the water damage is only affecting the speaker or microphone, it might help to clean these components. Use a soft brush or microfiber cloth to gently clean the speaker mesh and microphone hole. Avoid using any sharp objects or excessive force to prevent damaging the delicate components.
7. Seek Professional Help
If the sound persists after these fixes, it might be time to visit a professional technician or service center. They can open up your phone, dry the internal parts more effectively, and check for any other underlying issues caused by water damage.
Preventing Water Inside Your Phone
While it’s not always possible to prevent every instance of water damage, there are several precautions you can take to minimize the risk:
Use a Waterproof Case: Investing in a good-quality waterproof case can prevent water from entering your phone in the first place. These cases are designed to protect your phone in case of accidental drops or spills.
Be Cautious Around Water: Always be mindful of where you place your phone, especially around bodies of water, such as pools, rivers, or even a glass of water on your desk.
Avoid Humid Environments: Prolonged exposure to high humidity can cause internal moisture buildup in your phone. Avoid leaving your phone in bathrooms, saunas, or places with high humidity for extended periods.
Regularly Check for Updates: Many phones release software updates that improve their water resistance. Keeping your phone’s software up to date can help improve its resilience against water damage.
RV Water Pump Troubleshooting: Similarities with Water Inside Phone Sound
Interestingly, the concept of troubleshooting water-related issues in electronics is not limited to phones alone. RV owners often face problems with their water pumps, especially in the case of issues like the “water inside phone sound” when dealing with their RV water pumps. Here are a few related keywords and troubleshooting tips for RV water pumps that may help:
RV Water Pump Reset Button: If your RV water pump isn’t working, it might be due to a trip at the reset button. Check the location of your pump’s reset button and press it to restore normal operation.
RV Water Pump Pressure Switch: A faulty pressure switch can cause your RV water pump to malfunction. Check for any leaks or obstructions in the pressure switch that might prevent it from working properly.
RV Water Pump Not Working After Winterizing: If you’ve recently winterized your RV, the pump may not function properly due to blockages or air in the lines. Check for frozen pipes and ensure that the system is primed correctly.

Similar to the “water inside phone sound” problem, addressing water issues in RV systems requires a methodical approach. Troubleshooting involves checking for moisture, leaks, and other potential causes of malfunction. By understanding the root cause, you can apply the right solutions to restore your system to full functionality.
Frequently Asked Questions
How do you know if an RV water pump is bad?
There are several signs that your RV water pump might be malfunctioning. If your water pump is making strange noises, not producing enough pressure, or constantly running without dispensing water, these could indicate a problem. Other signs include water leakage around the pump, the pump running continuously without stopping, or no water flow at all despite the pump running.
Why does my RV water pump keep cycling on and off?
If your RV water pump keeps cycling on and off, it could be due to a faulty pressure switch, air in the water lines, or a leak in the system. The pressure switch may be malfunctioning, or the pump could be struggling to maintain water pressure. Checking the system for leaks and ensuring that the lines are properly primed can often resolve this issue.
What is the most common problem of a water pump?
The most common problem with water pumps is air entering the system. This can occur if the pump is not properly primed or if there is a leak in the water lines. Another common issue is a faulty pressure switch, which can cause irregular water flow or prevent the pump from working altogether. In some cases, a clogged filter or worn-out pump components can also lead to problems.
Why is my water not working in my RV?
If water is not working in your RV, the issue could be due to a faulty water pump, a clogged filter, or a leak in the water lines. Check the water pump for proper function, ensure the water tanks are full, and inspect the system for any visible leaks. It’s also important to ensure the RV’s water pressure switch is working correctly and there are no blockages in the pipes.
How do I reset my RV water pump?
To reset your RV water pump, first, locate the reset button, typically found near the pump. If your pump is not working correctly, pressing the reset button can restore its normal function. In some cases, turning the power off to the pump and waiting for a few minutes before turning it back on may also reset the system.
What are the symptoms of an RV water pump failure?
Symptoms of an RV water pump failure include inconsistent water flow, strange noises from the pump, or the pump running continuously without providing water. In some cases, you might hear a “water inside phone sound” or notice leaks around the pump. If the pump is not providing adequate water pressure, it may be time for a replacement.
Can an RV water pump be repaired?
Yes, many RV water pump issues can be repaired. For example, a clogged filter or a faulty pressure switch can often be replaced or cleaned. However, if the pump motor is damaged beyond repair, you may need to replace the entire unit. It’s always a good idea to consult a professional if you are unsure about the condition of your pump.
Why is my RV water pump making a loud noise?
A loud noise from your RV water pump could be a sign of air in the water lines, a blocked filter, or a worn-out pump. In some cases, the noise could indicate a failing pressure switch or a loose mounting bracket. It’s important to address these issues promptly to prevent further damage to your water pump system.
How do I troubleshoot an RV water pump that is not working?
To troubleshoot an RV water pump that is not working, check for common issues such as a blown fuse, air in the water lines, or a clogged filter. Inspect the water pump for any visible leaks or damage and ensure that the pressure switch is functioning correctly. If the pump still doesn’t work, you may need to replace it or have it serviced.
Can a malfunctioning RV water pump cause water to stop flowing?
Yes, a malfunctioning RV water pump can stop water from flowing. If the pump is not operating correctly, it may fail to push water through the system, leading to no water coming out of the faucets or shower. Inspecting the pump, pressure switch, and water lines for leaks or blockages can help resolve this issue.
Conclusion
Hearing the “water inside phone sound” can be concerning, but with the right approach, you can prevent further damage and restore your device’s functionality. Whether it’s drying your phone out properly, using silica gel, or seeking professional help, there are plenty of options to explore. If the issue persists, consider getting expert assistance to ensure your phone is in the best shape possible.
Take action today, and remember to take preventative measures to keep your phone safe from water damage in the future. And if you’re facing similar issues with your RV water pump or other water-related devices, the troubleshooting tips we’ve covered here can also help you get back on track.